Add Inventory And Inventory HUD components
Create player controller
Create a Player Controller. If you already have your own controller, proceed to the next step.
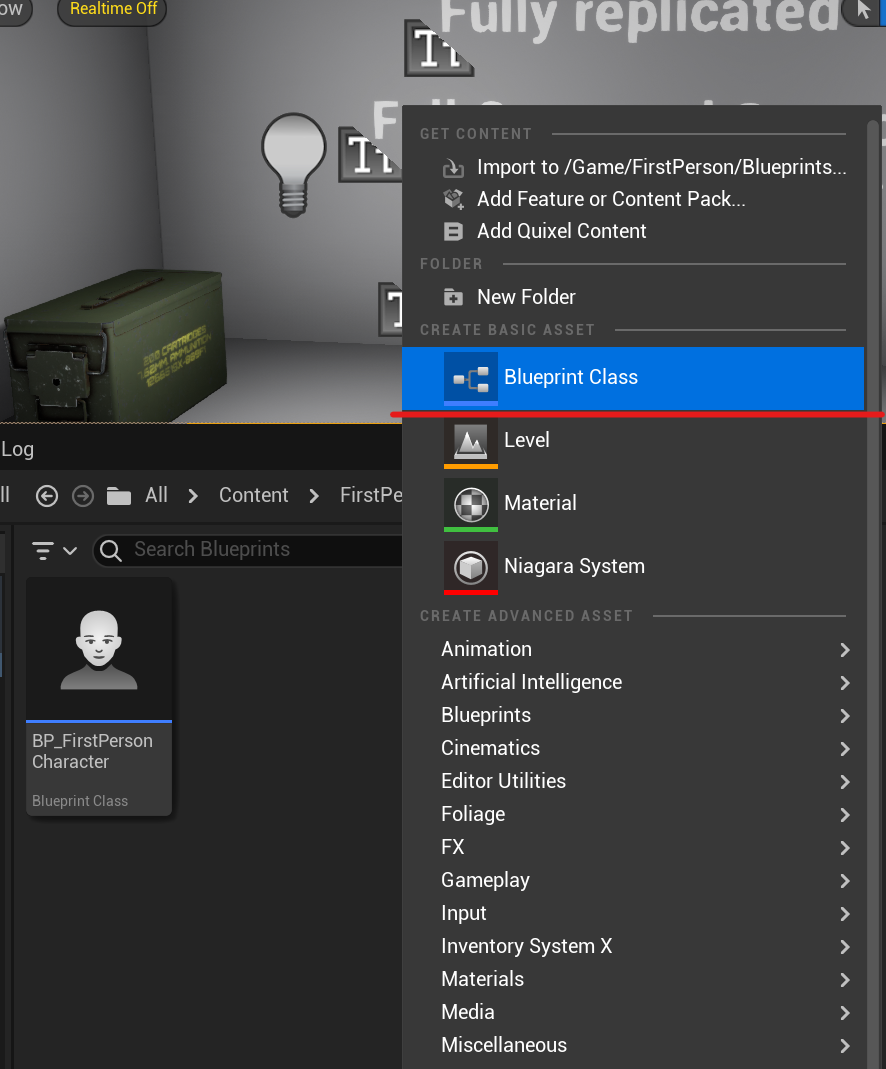
You need to create a new Blueprint class in the context browser by right-clicking and selecting "Blueprint Class".
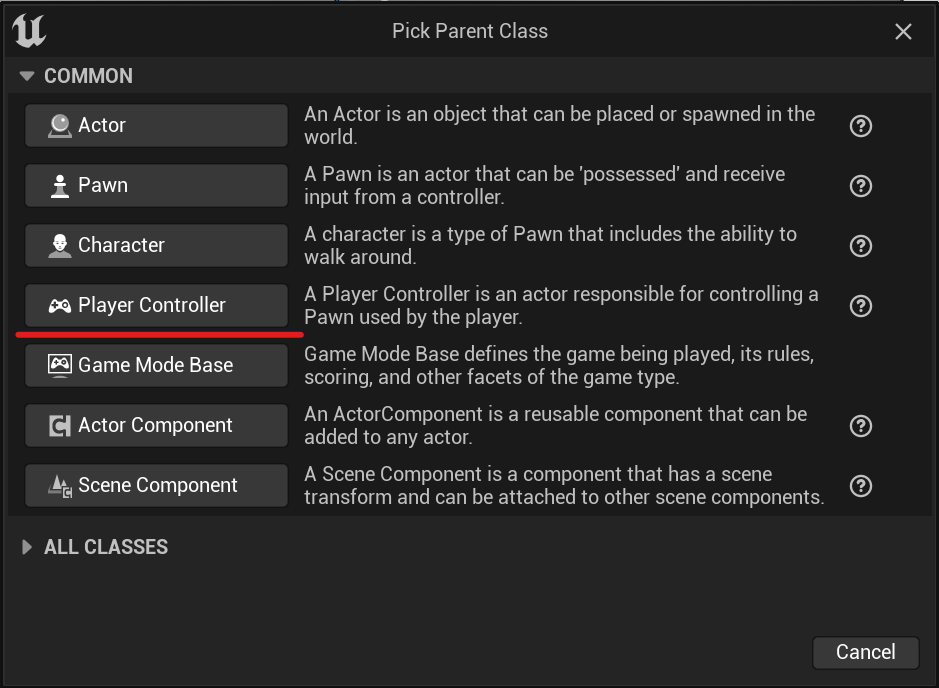
Then, choose the Player Controller class.
Name it as you wish.
Add main components
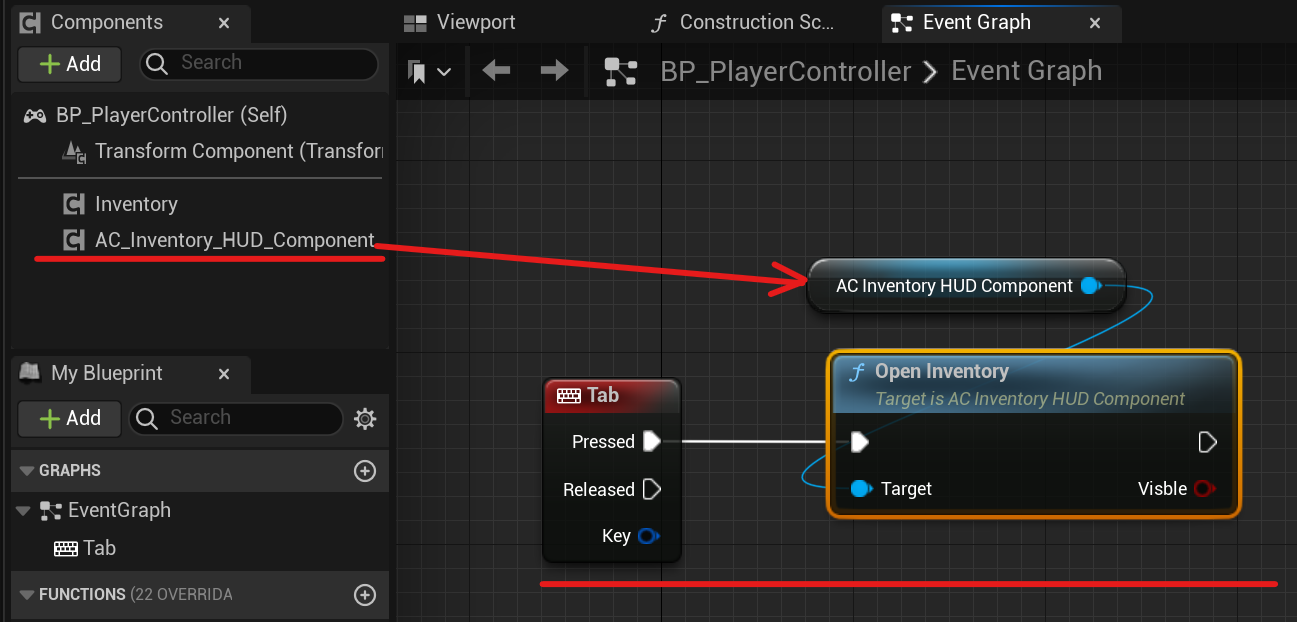
Open the Player Controller blueprint and add two components to it: the Inventory Component and the Inventory HUD Component.
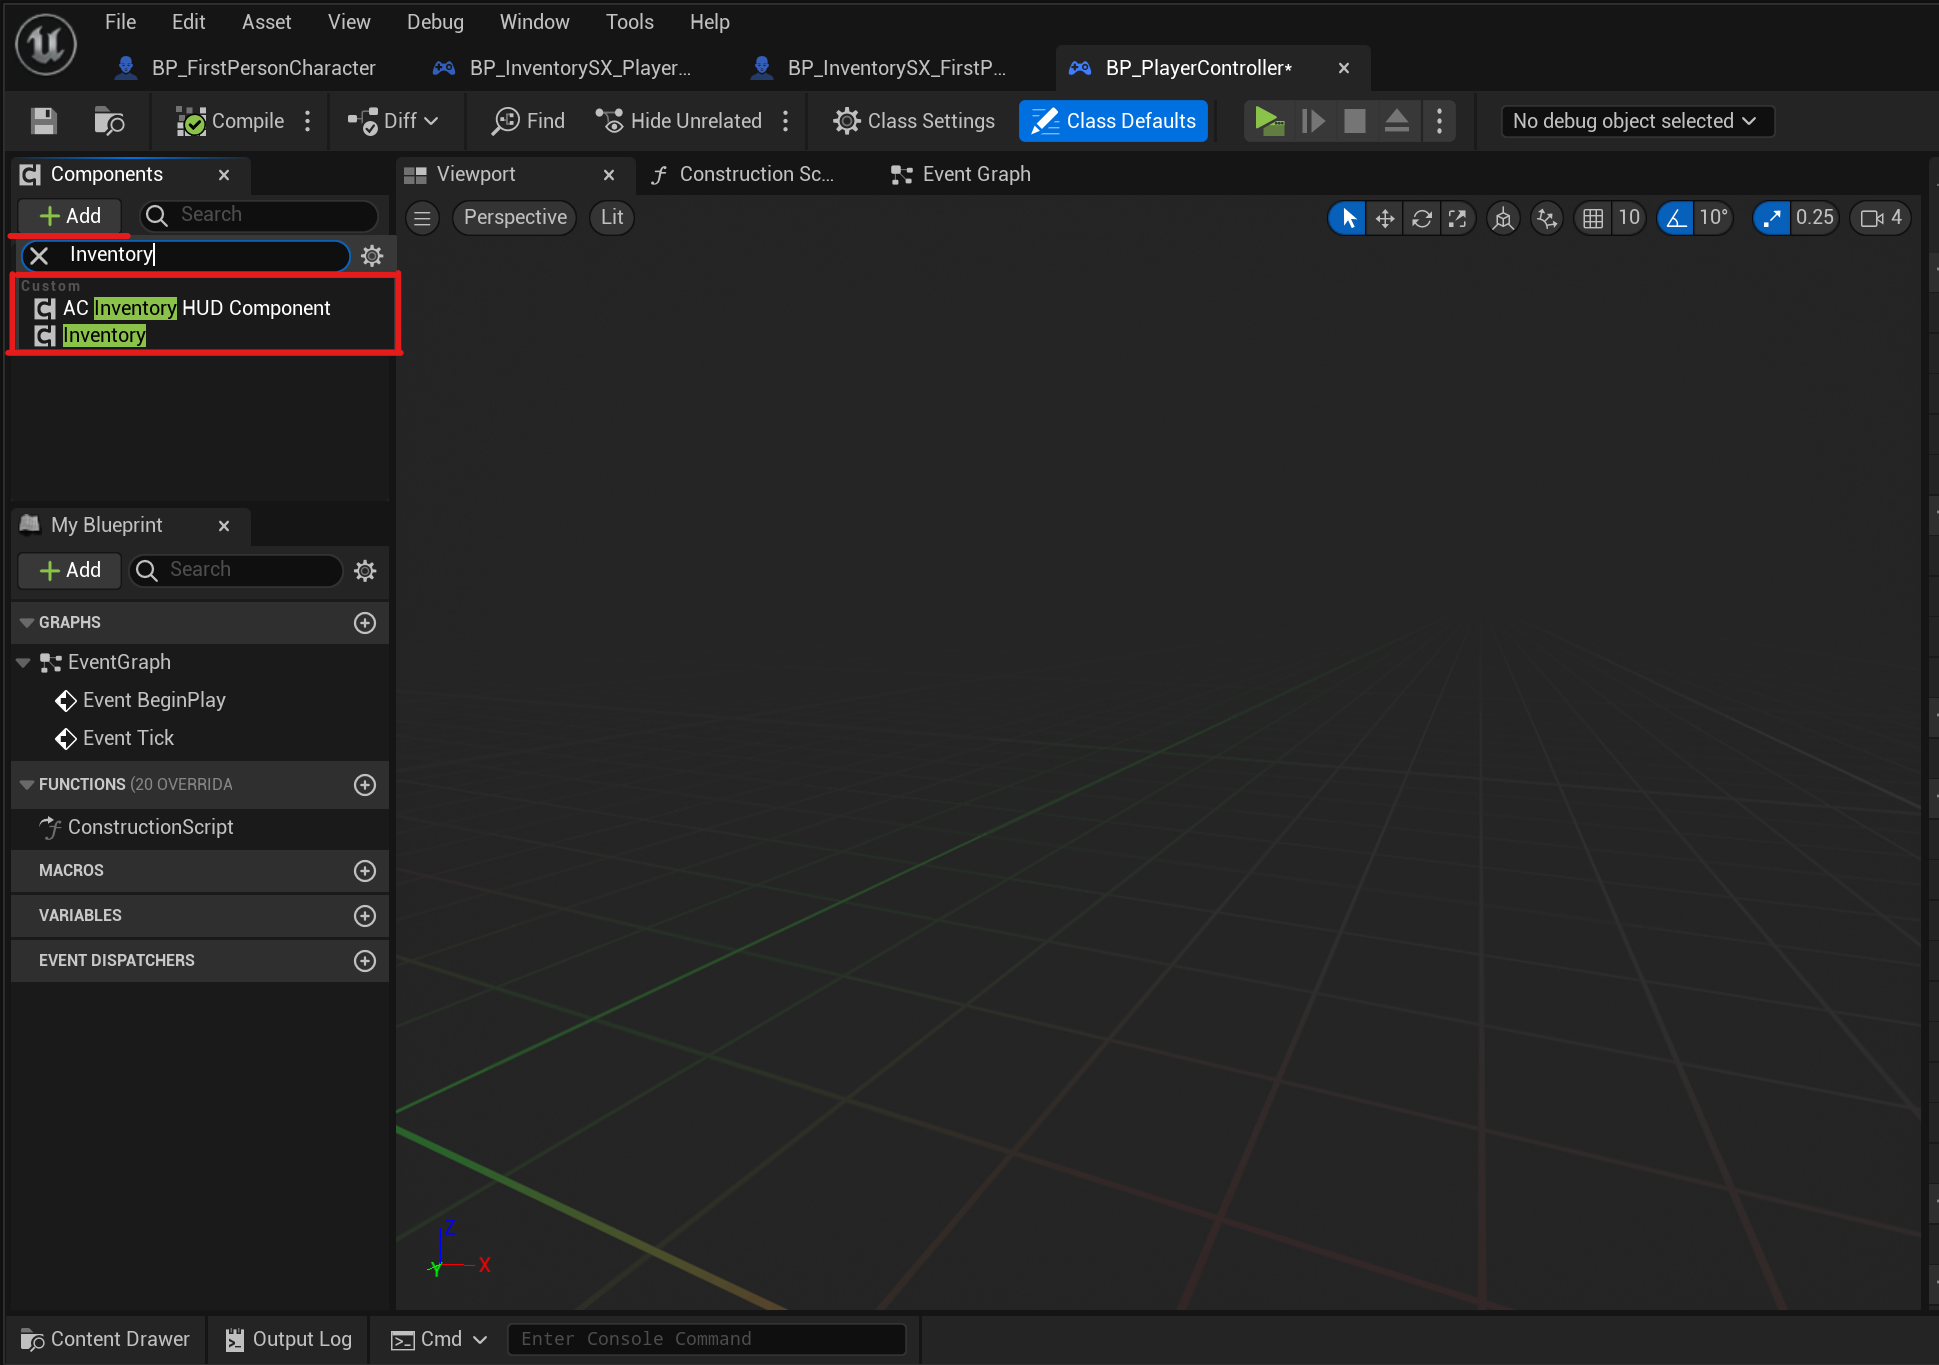
Inventory Component - is the key component that stores information about slots and items.
Inventory HUD Component - receives information from the Inventory Component about slots and items and displays it on the screen. This is where all widget behavior is defined, including links to them.
Setup inventory
Set a unique identifier for your inventory. This can be any combination of letters and numbers. It is used by the save system.
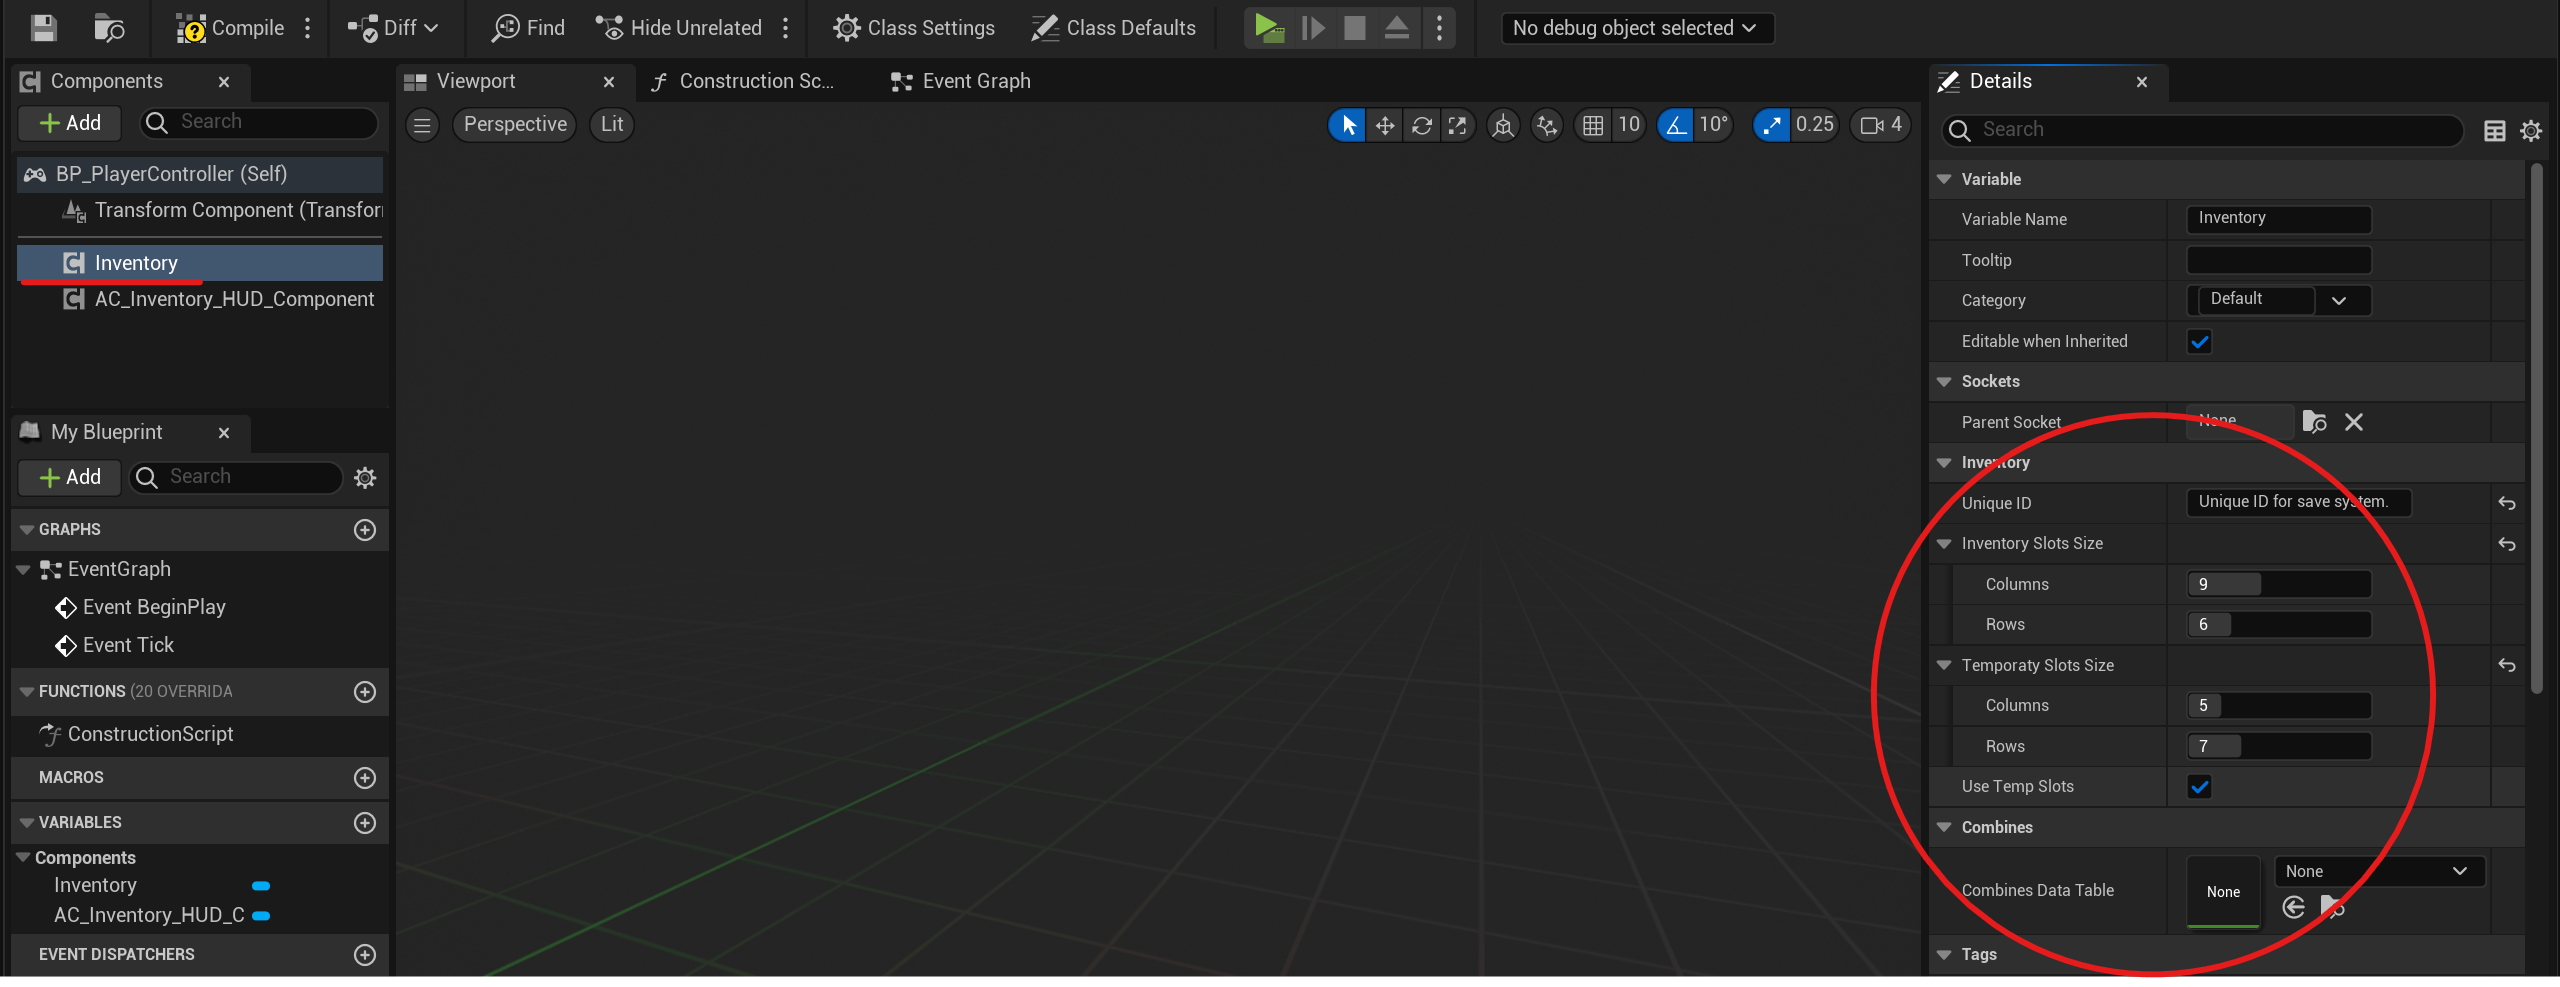
Set the number of columns and rows to specify the size of the main slots and additional ones. You can also disable additional slots.
Open Inventory Event
To open the inventory, connect the Open Inventory function from the Inventory HUD Component to any
event that you
want to use to open the inventory. In the example, the inventory is opened when I press the tab key.
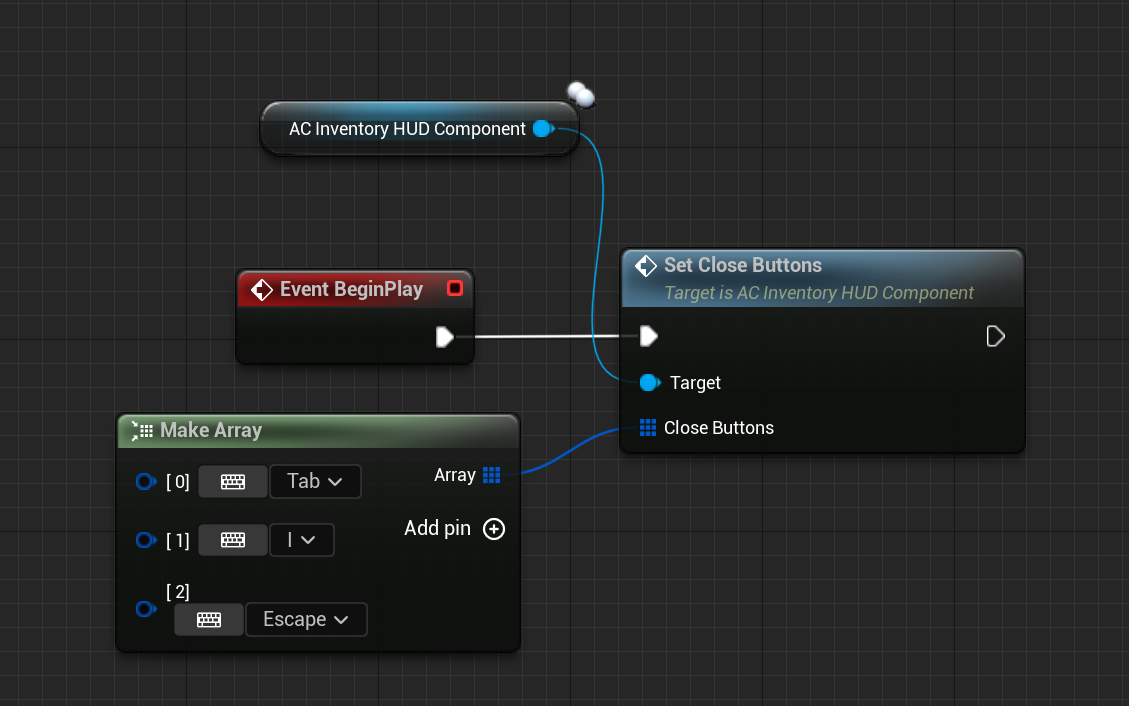
The inventory will not be closed with the same key, as the Input Mode UI Only is enabled. Therefore, all further
control is prescribed in the widget. To change the keys for closing the inventory, you can reassign them by calling the
Set Close Buttons function as shown in the screenshot below.
Create Game Mode
Now we need the character to use this player controller. To do this, create a new Game Mode class. If you already have your own game mode class or your controller is connected to your game mode, you can skip this step.
Right-click in the content browser and create a new blueprint class. Choose Game Mode Base.
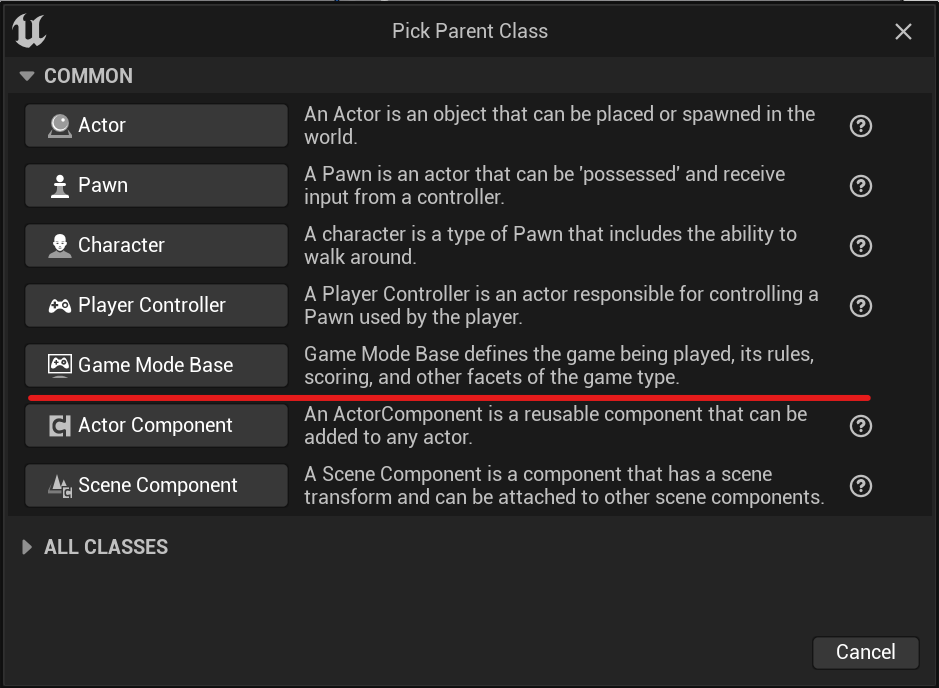
Name it as you wish.
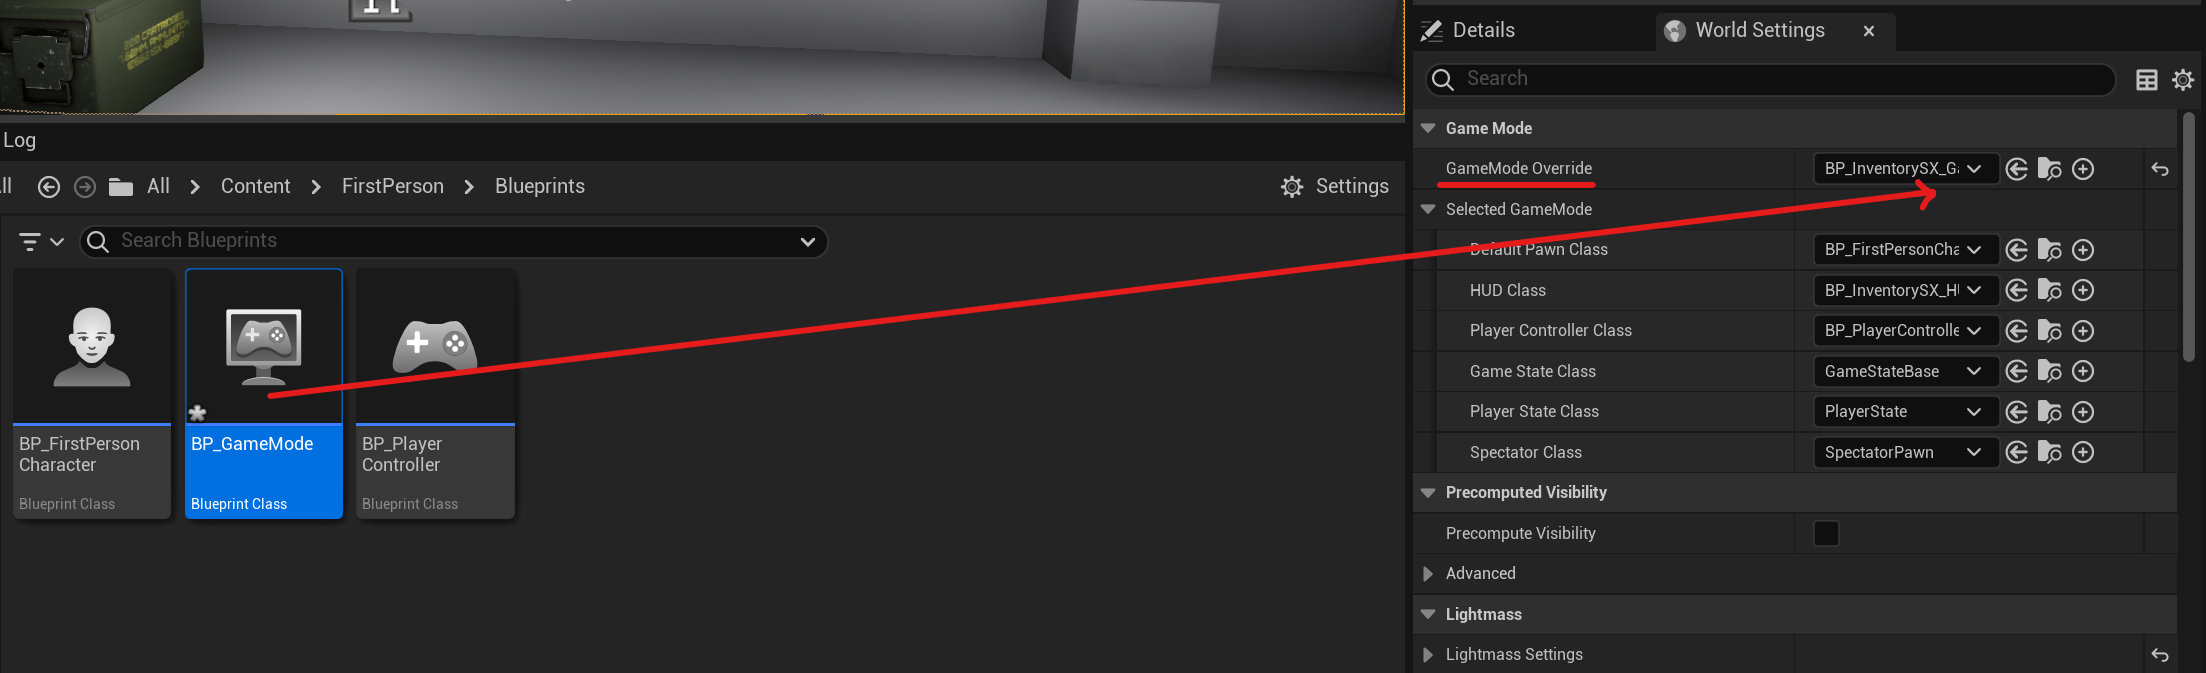
World Settings
To enable the World Settings tab in Unreal Engine, follow these steps: Click the Windows button on the main toolbar. In the drop-down menu that appears, select World Settings. The World Settings panel is docked next to the Details panel in the editor UI by default. From here, you can now specify the settings for the current Level.
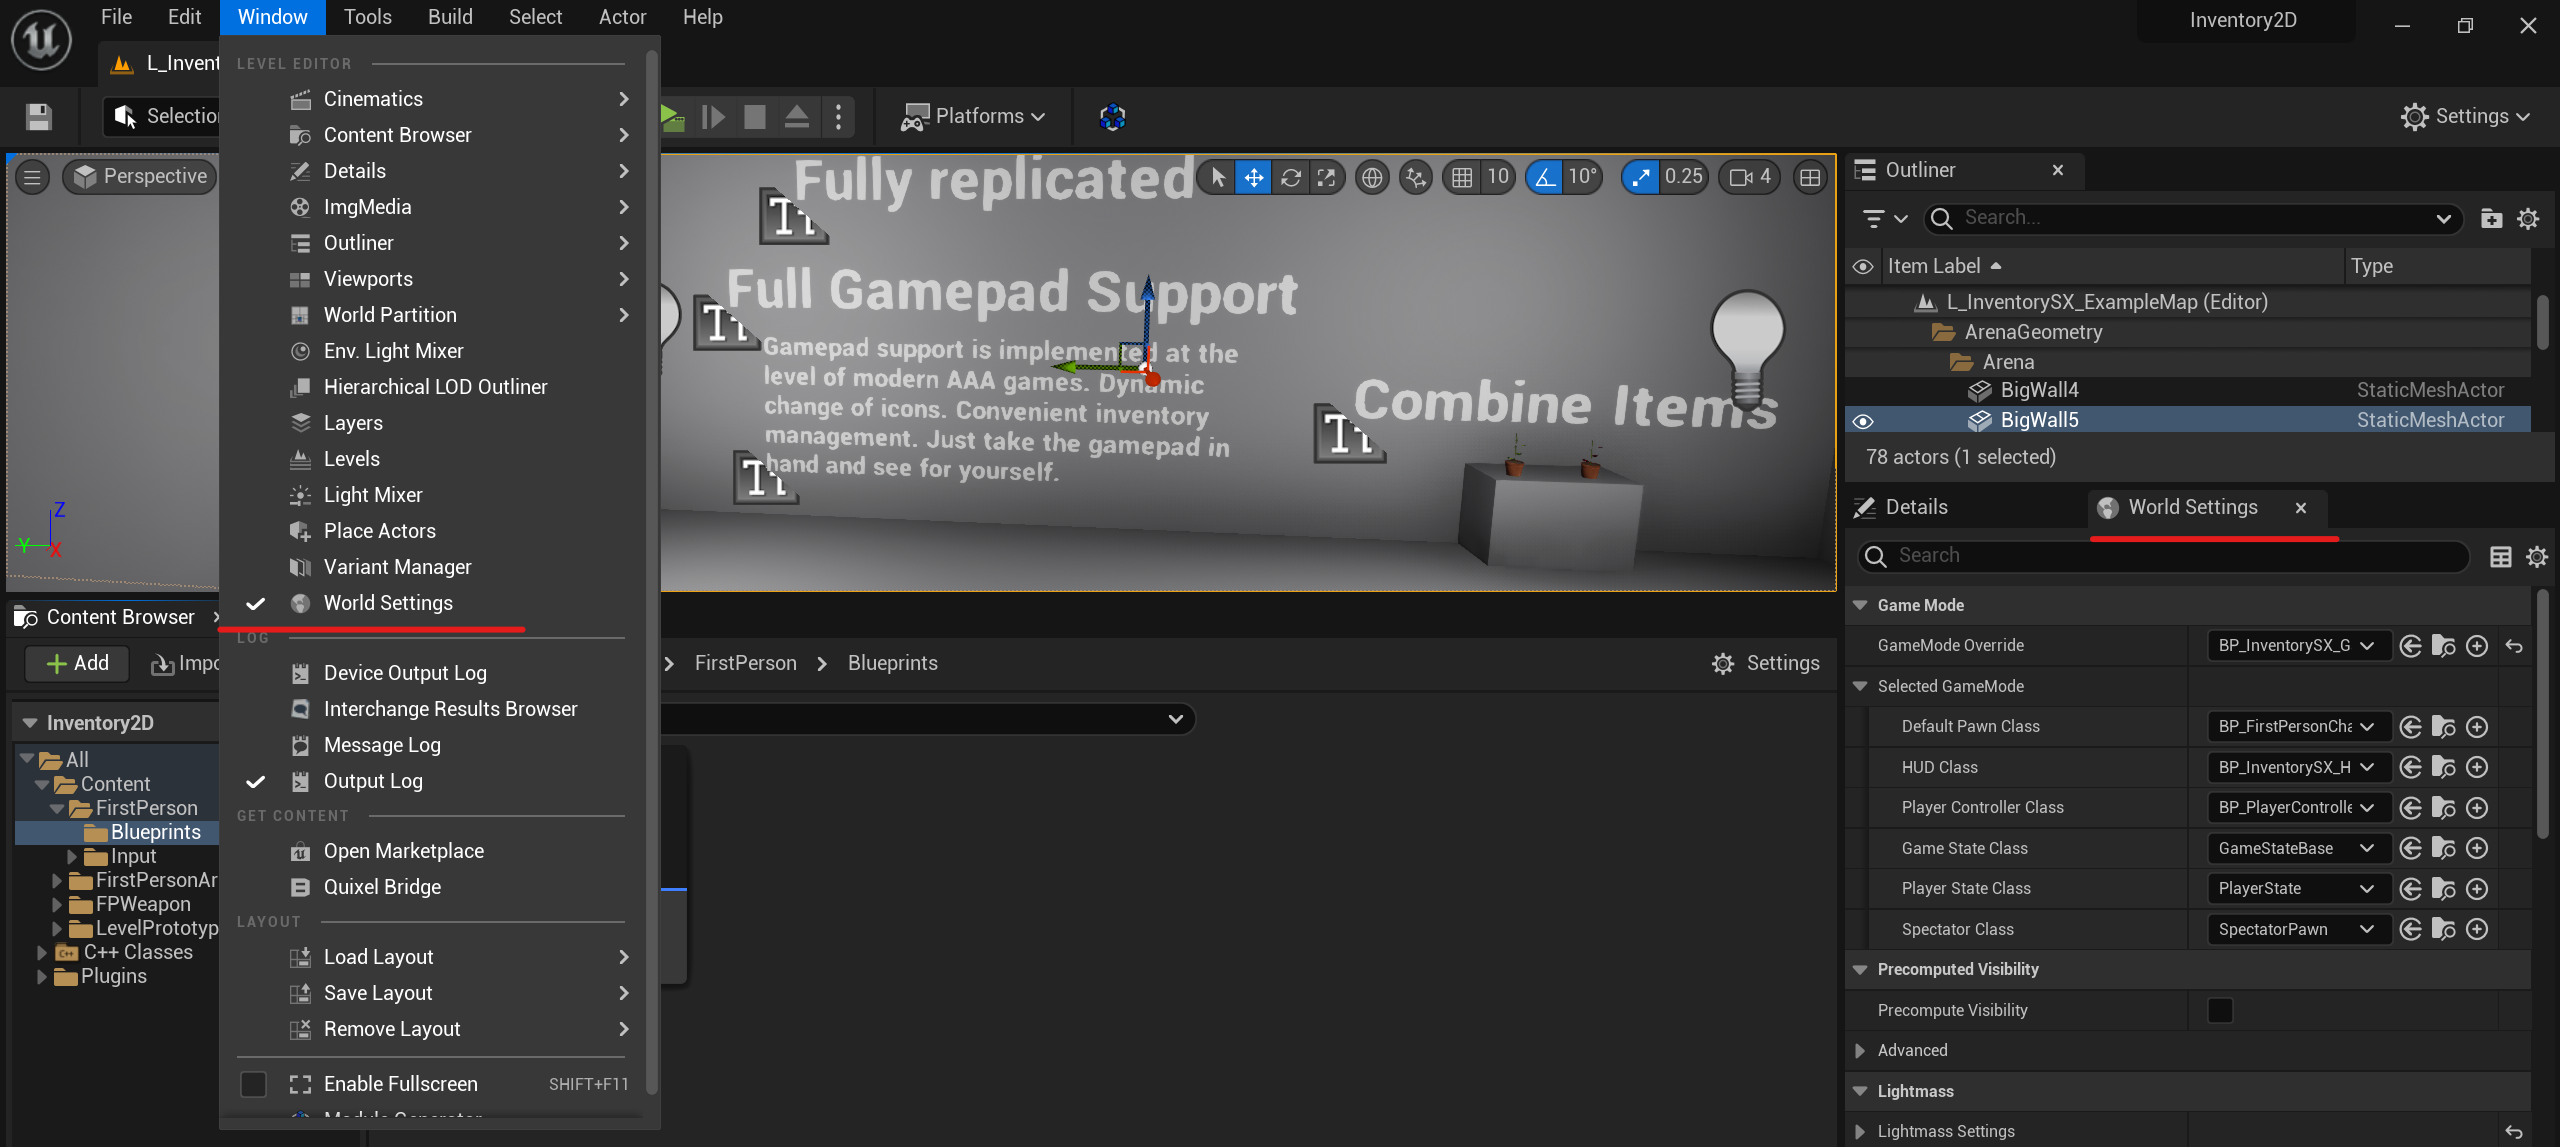
Drag the Game Mode we created into the Game Mode Override variable in the World Settings tab.
Drag the Player Controller into the Player Controller class variable. You can move it to the World Settings tab, but it’s better to first open our Game Mode and drag it there as shown in the screenshot.
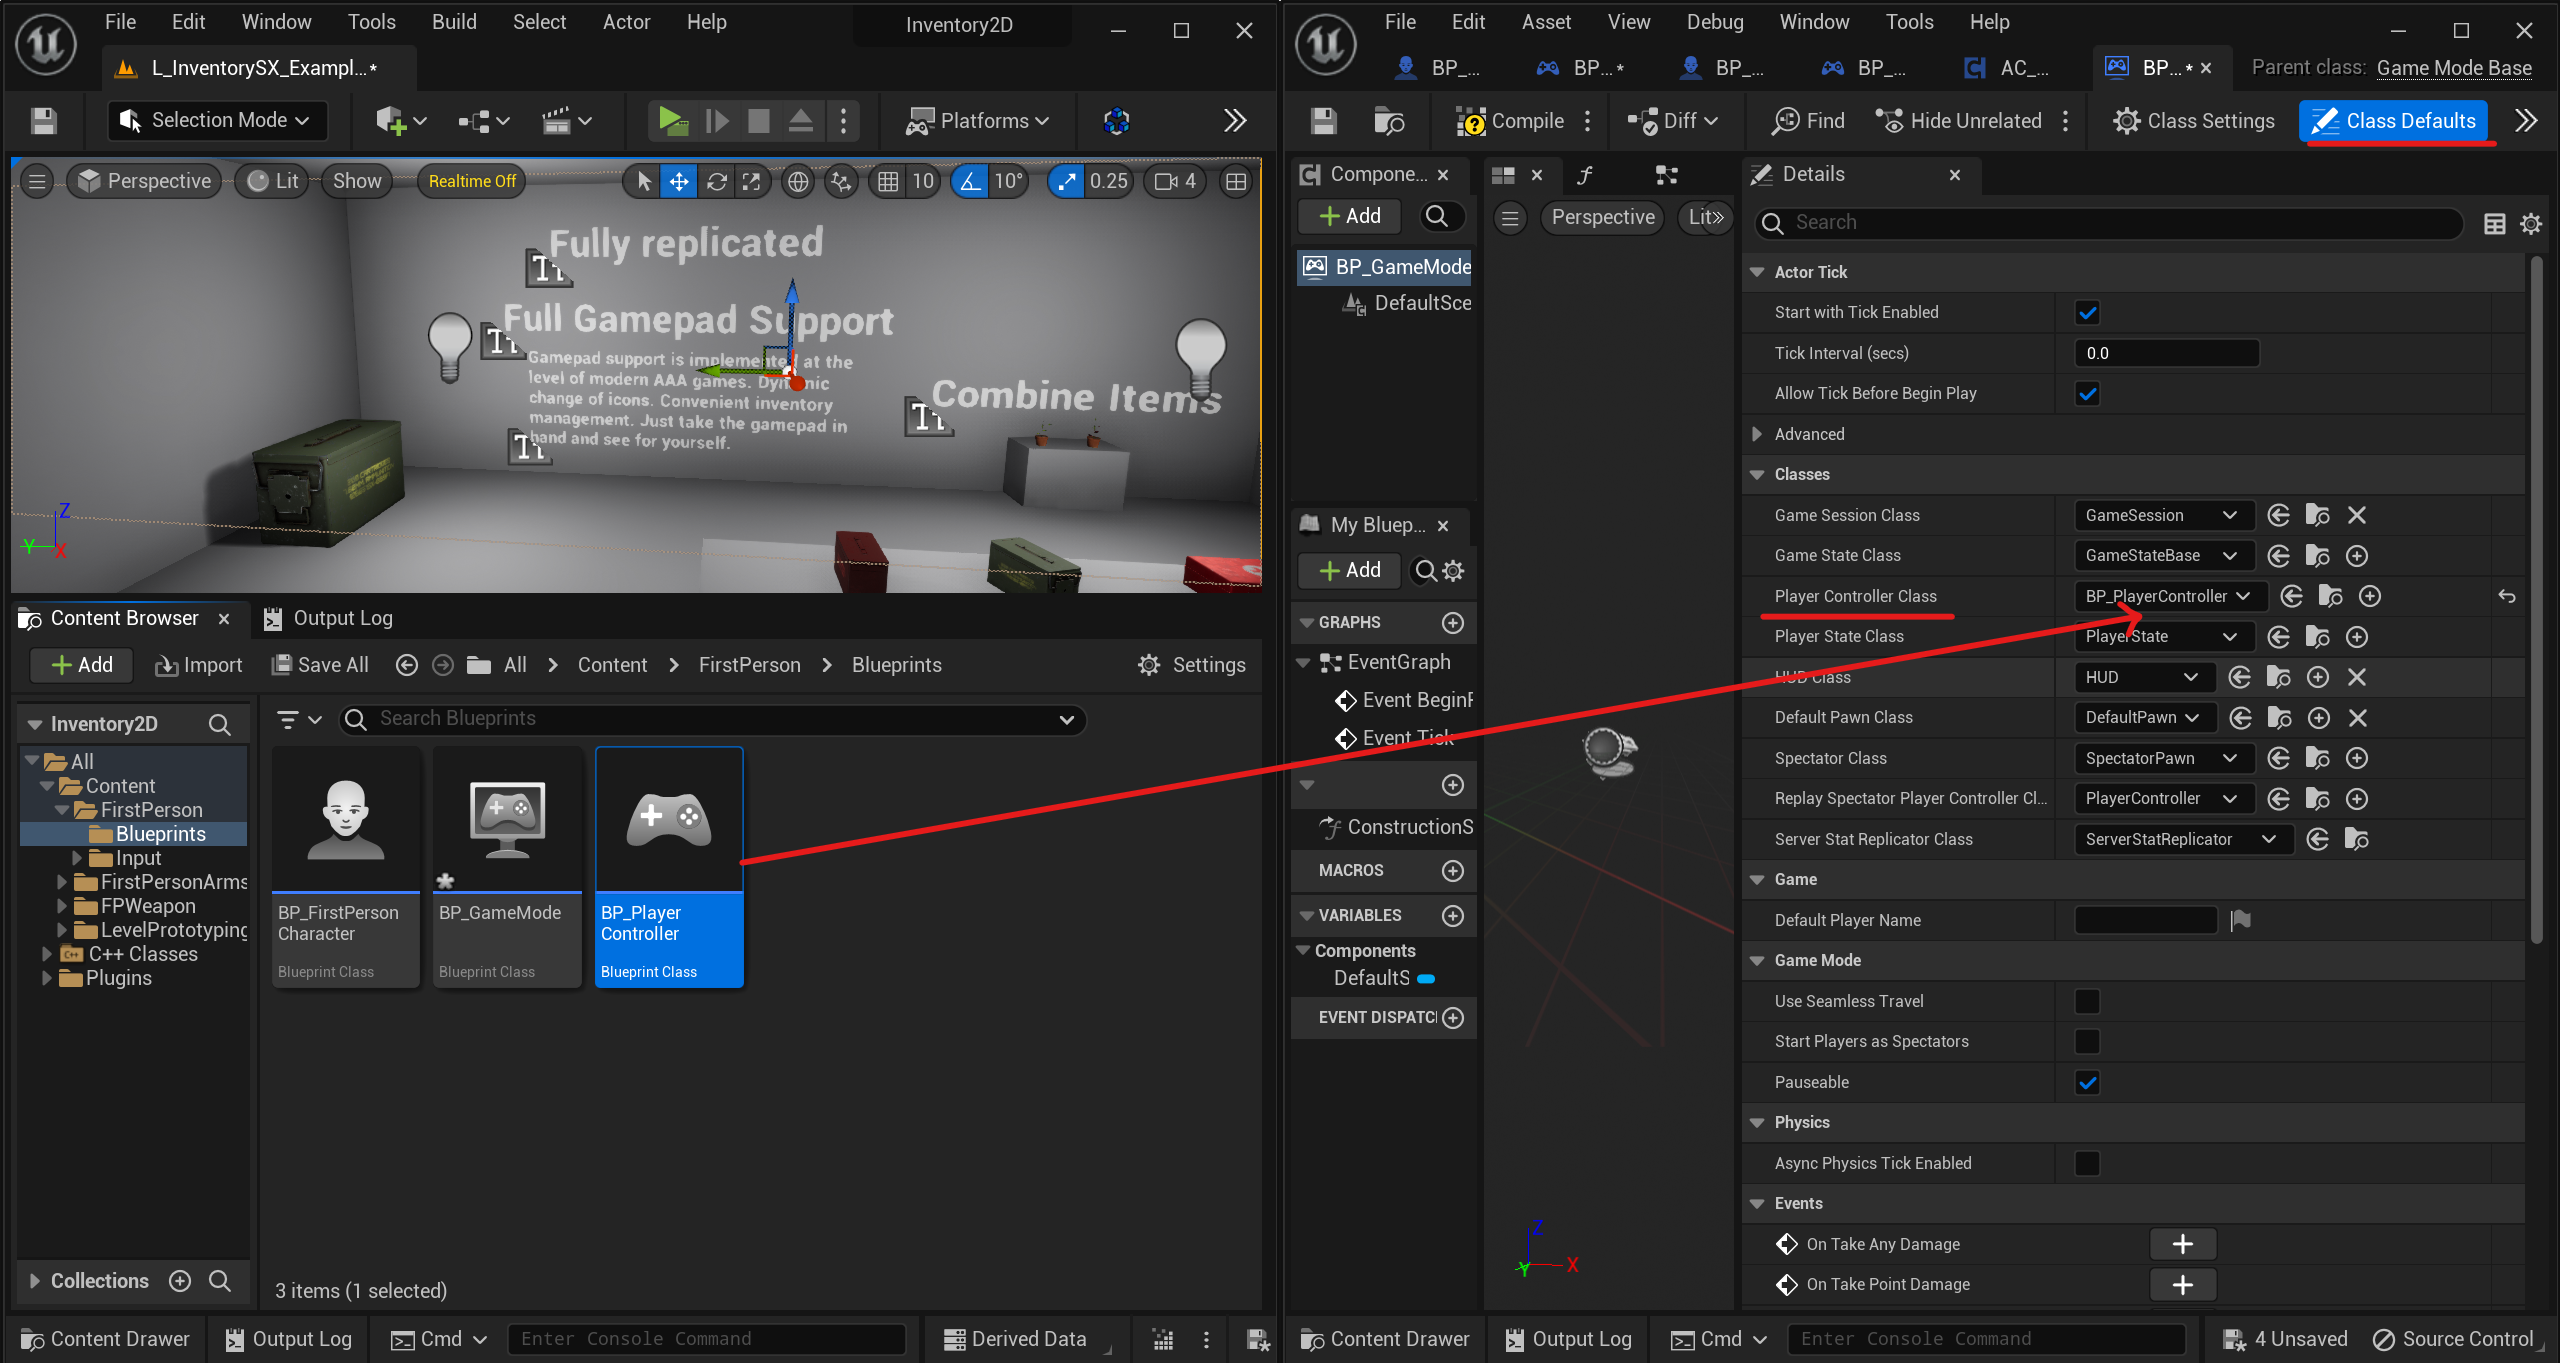
Also drag your character into the Default Pawn Class variable.
Run the game and press the inventory open key, everything should work.
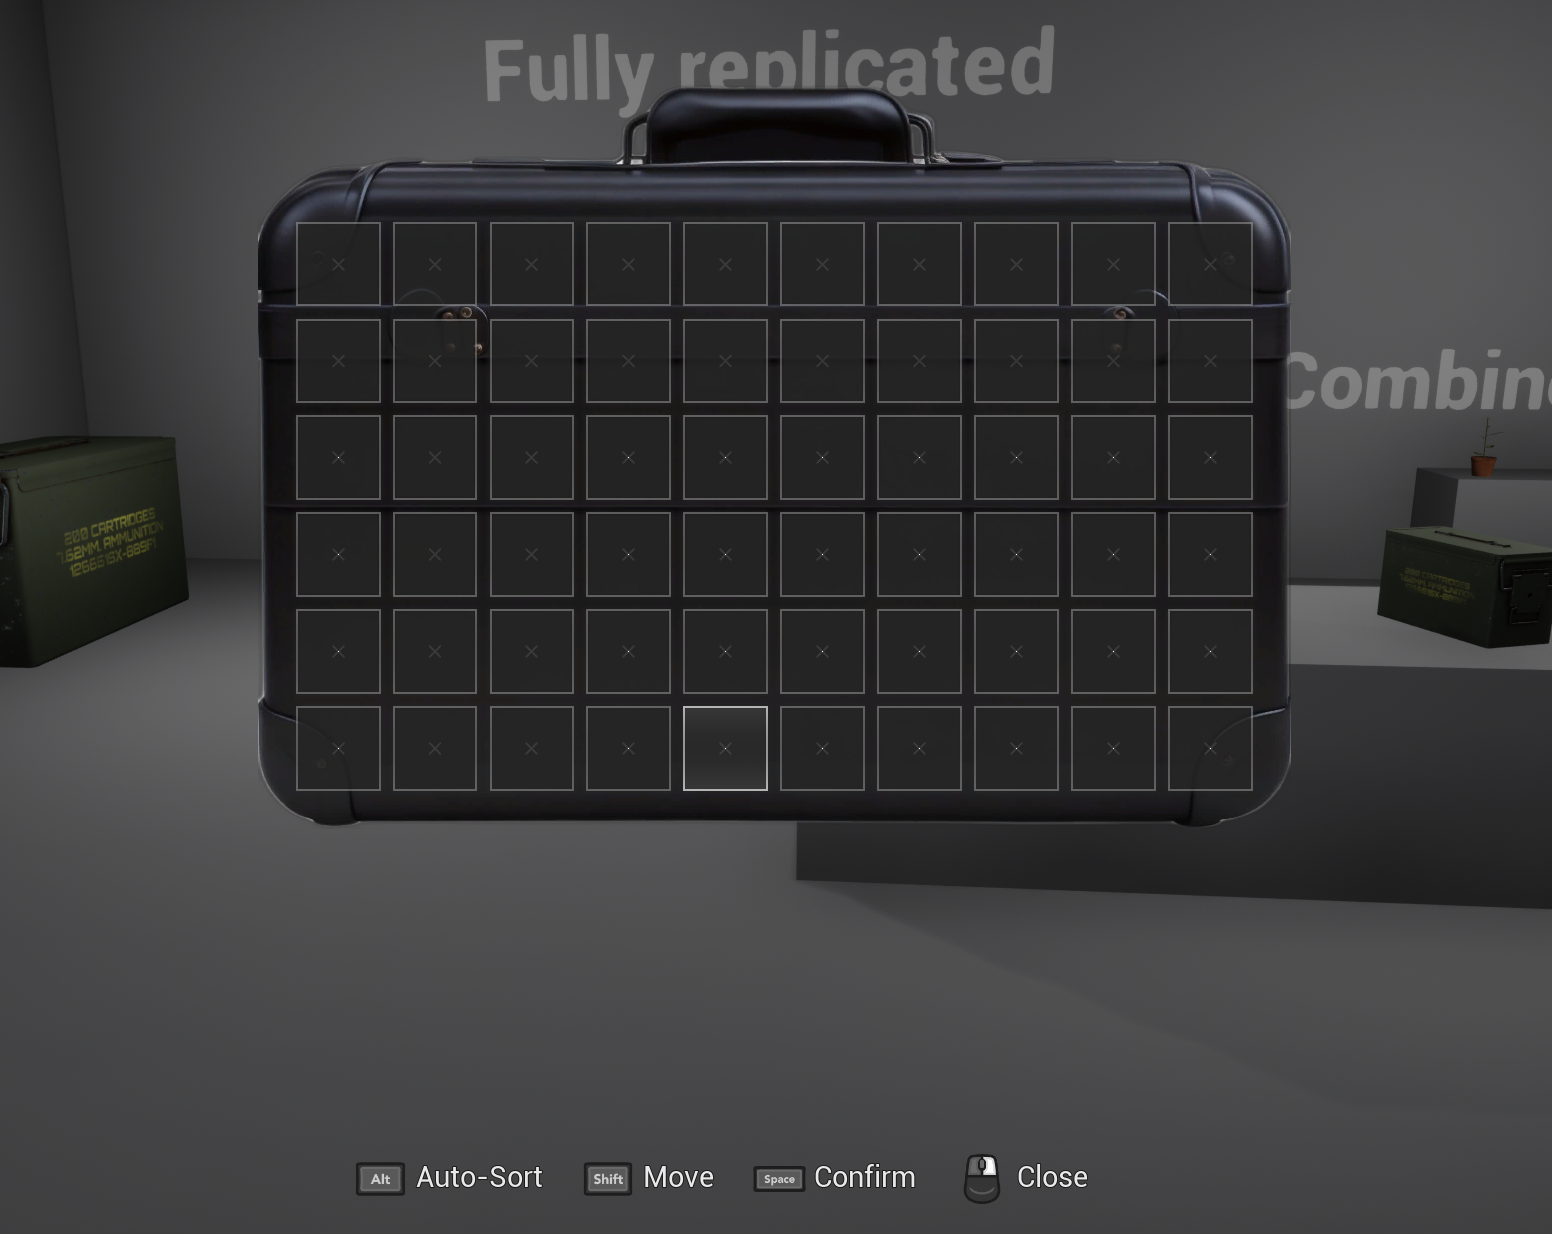
It may look different for you if you chose a different inventory size and the image will not be displayed under its size, but it’s okay. How to change the background of the inventory will be discussed in the next chapters.